Projects Management
Studio8 use the built-in WordPress custom post type feature for managing your work. In this section, you will learn how to add and manage your projects.
Creating your first project
Head over the projects menu item in the left navigation area, click on Add New.
- Enter the project title.
- Set your featured image.
- Assign categories for this project.
- Enter a small description of your project in the Case Study field.
- Use the content editor to create any content you want about your project. You can build a gallery by clicking on Add Media button. Refer to the Building a gallery section to learn more about galleries in this theme.
- Use the available Built-in shortcodes to create a amazing content’s layout for your projects showcases.
Project options
- Display Title: Display the project’s title and category over the Hero Image.
- Client: Display for which client you have worked over the Hero Image (Display Title need to be enabled).
- Hero Image: Set a unique background image for this project. This field is optional, if you don’t upload a Hero Image, the post’s Featured Image will be used.
Building a gallery
The built-in WordPress gallery feature has been altered within the theme functions to display nice and large gallery images with the possibility to click on them to display a fullscreen slideshow with thumbnail navigation.
- Click on Add Media button.
- Click on Create Gallery link.
- Upload or select your images. When done, click on Create a new gallery button (bottom right of the windows).
- Organize your gallery, drag and drop to reorder images.
- Within the Gallery Settings, set your images to link To Media File and set the number of columns you want to use.
- Click on Insert gallery.
Project panel
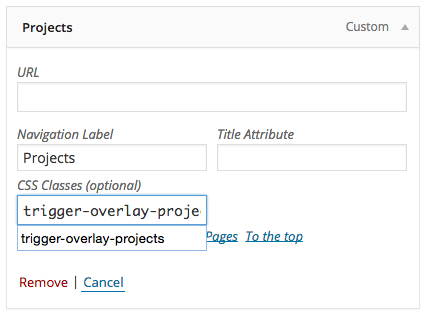
When you hit the Projects menu items within the top main navigation, a sliding panel appear from the right of your screen. To achieve that, simply create a empty link (#) for the Project menu and assign it with the following class name trigger-overlay-projects.


Recent Comments